
Integrated POS? Products come to you
If your POS is integrated, any item marked available on web in your till's back office pulls through to the Products section automatically. You can't edit item details here — names, prices and descriptions are controlled from the till — but you can add a product image for the customer-facing menu. To add or remove an item, change its web availability in your POS back office. Then skip to Create a menu.
Manual setup: Create a product
If your till isn't integrated — or you're selling something the bar doesn't ring up, like merch — build products by hand.
- Go to Products and click Create product
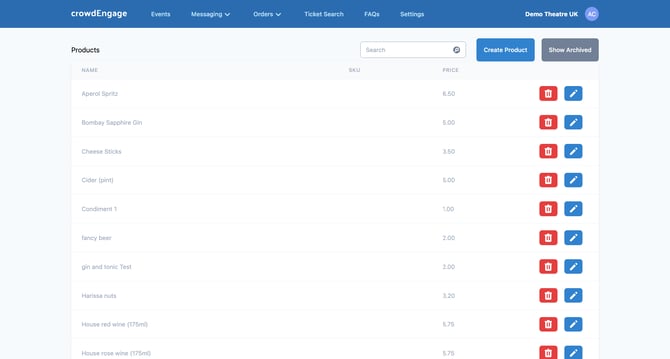
- Fill in the item. Name and price are required; a description and image are worth adding — they're what the customer sees.
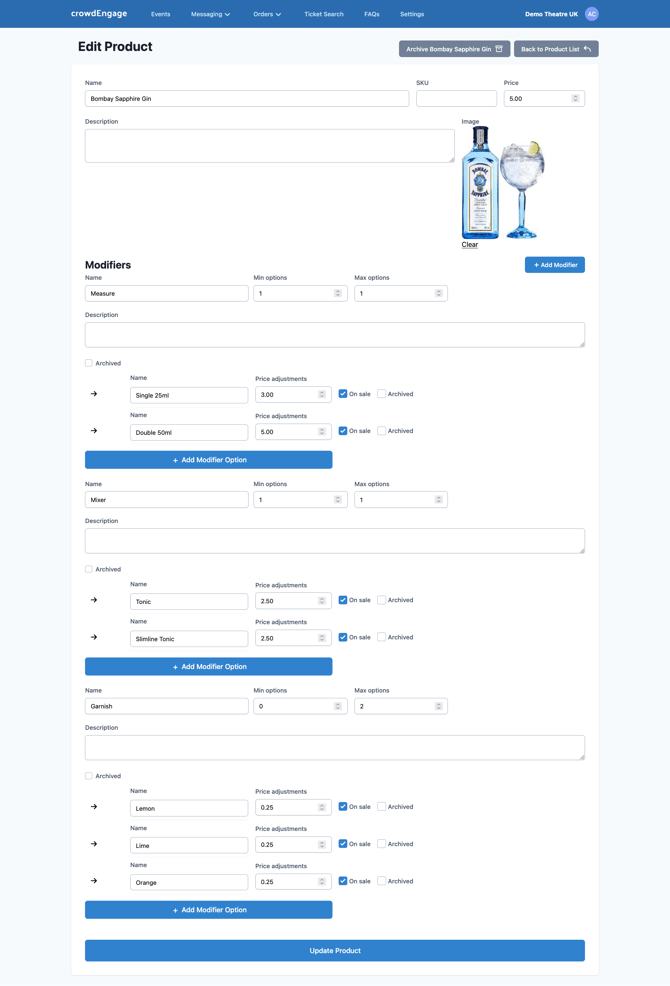
Add modifiers (the options a customer picks)
Further down the product, set modifiers (the choices offered at order time). A gin and tonic might offer single or double, and a choice of tonic. Each option can carry its own added charge, and it all shows to the customer in a clean, tap-to-choose format.
Repeat for every item you want to sell. Once your products exist, you're ready to group them into a menu.
If it's not working- An integrated item isn't showing. It's not marked available on web in your POS back office — and on some systems its section and modifiers must be marked available too. Your POS provider can point you to that setting.
- Can't edit an integrated product's price or name. That's expected — those come from the till. Only the image is editable in crowdEngage.
If you can't find what you need, contact support for guidance. Each integrated till system works slightly differently and we'll help you navigate your way around it, so you've got increased bar revenue in no time!
Help: support@encorepro.com